Setup for Access Management for Databricks all-purpose compute clusters with Object-Level Access Control (OLAC)
Configure
Perform following steps to configure Databricks OLAC:
-
SSH to the instance where Privacera Manager is installed.
-
Run the following command to navigate to the /config directory and copy yml files:
- Modify the following properties:
- No modification required in
vars.databricks.scala.yml. - In
vars.databricks.plugin.ymlfile, update the following properties with the appropriate values:
- No modification required in
- Once the properties are configured, Run Privacera Manager post-install action Refer this
Enable Databricks Application
- In PrivaceraCloud, go to Settings -> Applications.
- On the Applications screen, select Databricks.
- Select Platform Type
- Enter the application Name and Description. Click Save. Name could be any name of your choice. E.g.
Databricks. - Open the Databricks application.
- Enable the Access Management option with toggle button.
- Click on save button
Download Script from PrivaceraCloud
- Open the Databricks application.
- Click on Access Management
- Click on Download Script
- Save script on local as privacera_databricks.sh
Create Init script in Databricks Workspace File
- Login Databricks Web UI
- Click on Workspace sidebar
- Clck on Workspace folder
- Click on Create -> Folder
- Give name privacera
- Click on Create
- Go inside privacera folder
- Click on Create -> File
- Fill New File Name privacera_databricks.sh
- Copy content of local privacera_databricks.sh and paste in workspace file privacera_databricks.sh
Create Databricks cluster policy
We recommend to use Databricks cluster policy to control cluster configuration. Here are the steps to create cluster policy:
- Log in to Databricks Web UI
- Click on the Compute icon on the sidebar
- Click on the Policies tab
- Click on the Create policy button
- Provide a name to the policy i.e privacera-olac-cluster-policy
- Add below policy definition, and replace
with your actual instance-profile-arn
instance-profile-arn is Optional
This IAM role should not have access to the S3 buckets which are managed by Privacera Dataserver.
Create Databricks cluster
Here are the steps to create databricks cluster with Privacera plugin (OLAC):
Cluster name restrictions
Cluster names can use underscores (_) for separation in name. Avoid using other special characters and spaces.
- Log in to Databricks Web UI
- Click on the Compute icon on the sidebar
- Click the Create Compute button.
- Fill in the cluster configuration details.
- Under the Cluster Policies dropdown which we created in previous step (i.e privacera-olac-cluster-policy)
- Under the Advanced option :
- Select the source as Workspace for init scripts.
- Specify the Workspace file path:
- Self Managed and Data Plane
- /privacera/{DEPLOYMENT_ENV_NAME}/ranger_enable_scala.sh
- PrivaceraCloud
- /privacera/{DEPLOYMENT_ENV_NAME}/privacera_databricks.sh
- Self Managed and Data Plane
- Click on the Add button.
- Click Create Compute to create the cluster.
Validation
To confirm the successful association of an access management policy to data in your Databricks installation, follow these steps:
Ranger Policy Repo
It will use privacera_s3 repo for access control
-
Prerequisites:
- A running Databricks cluster secured as described in the previous steps.
- At least one resource policy associated with your data that grants a user access to the S3 path.
-
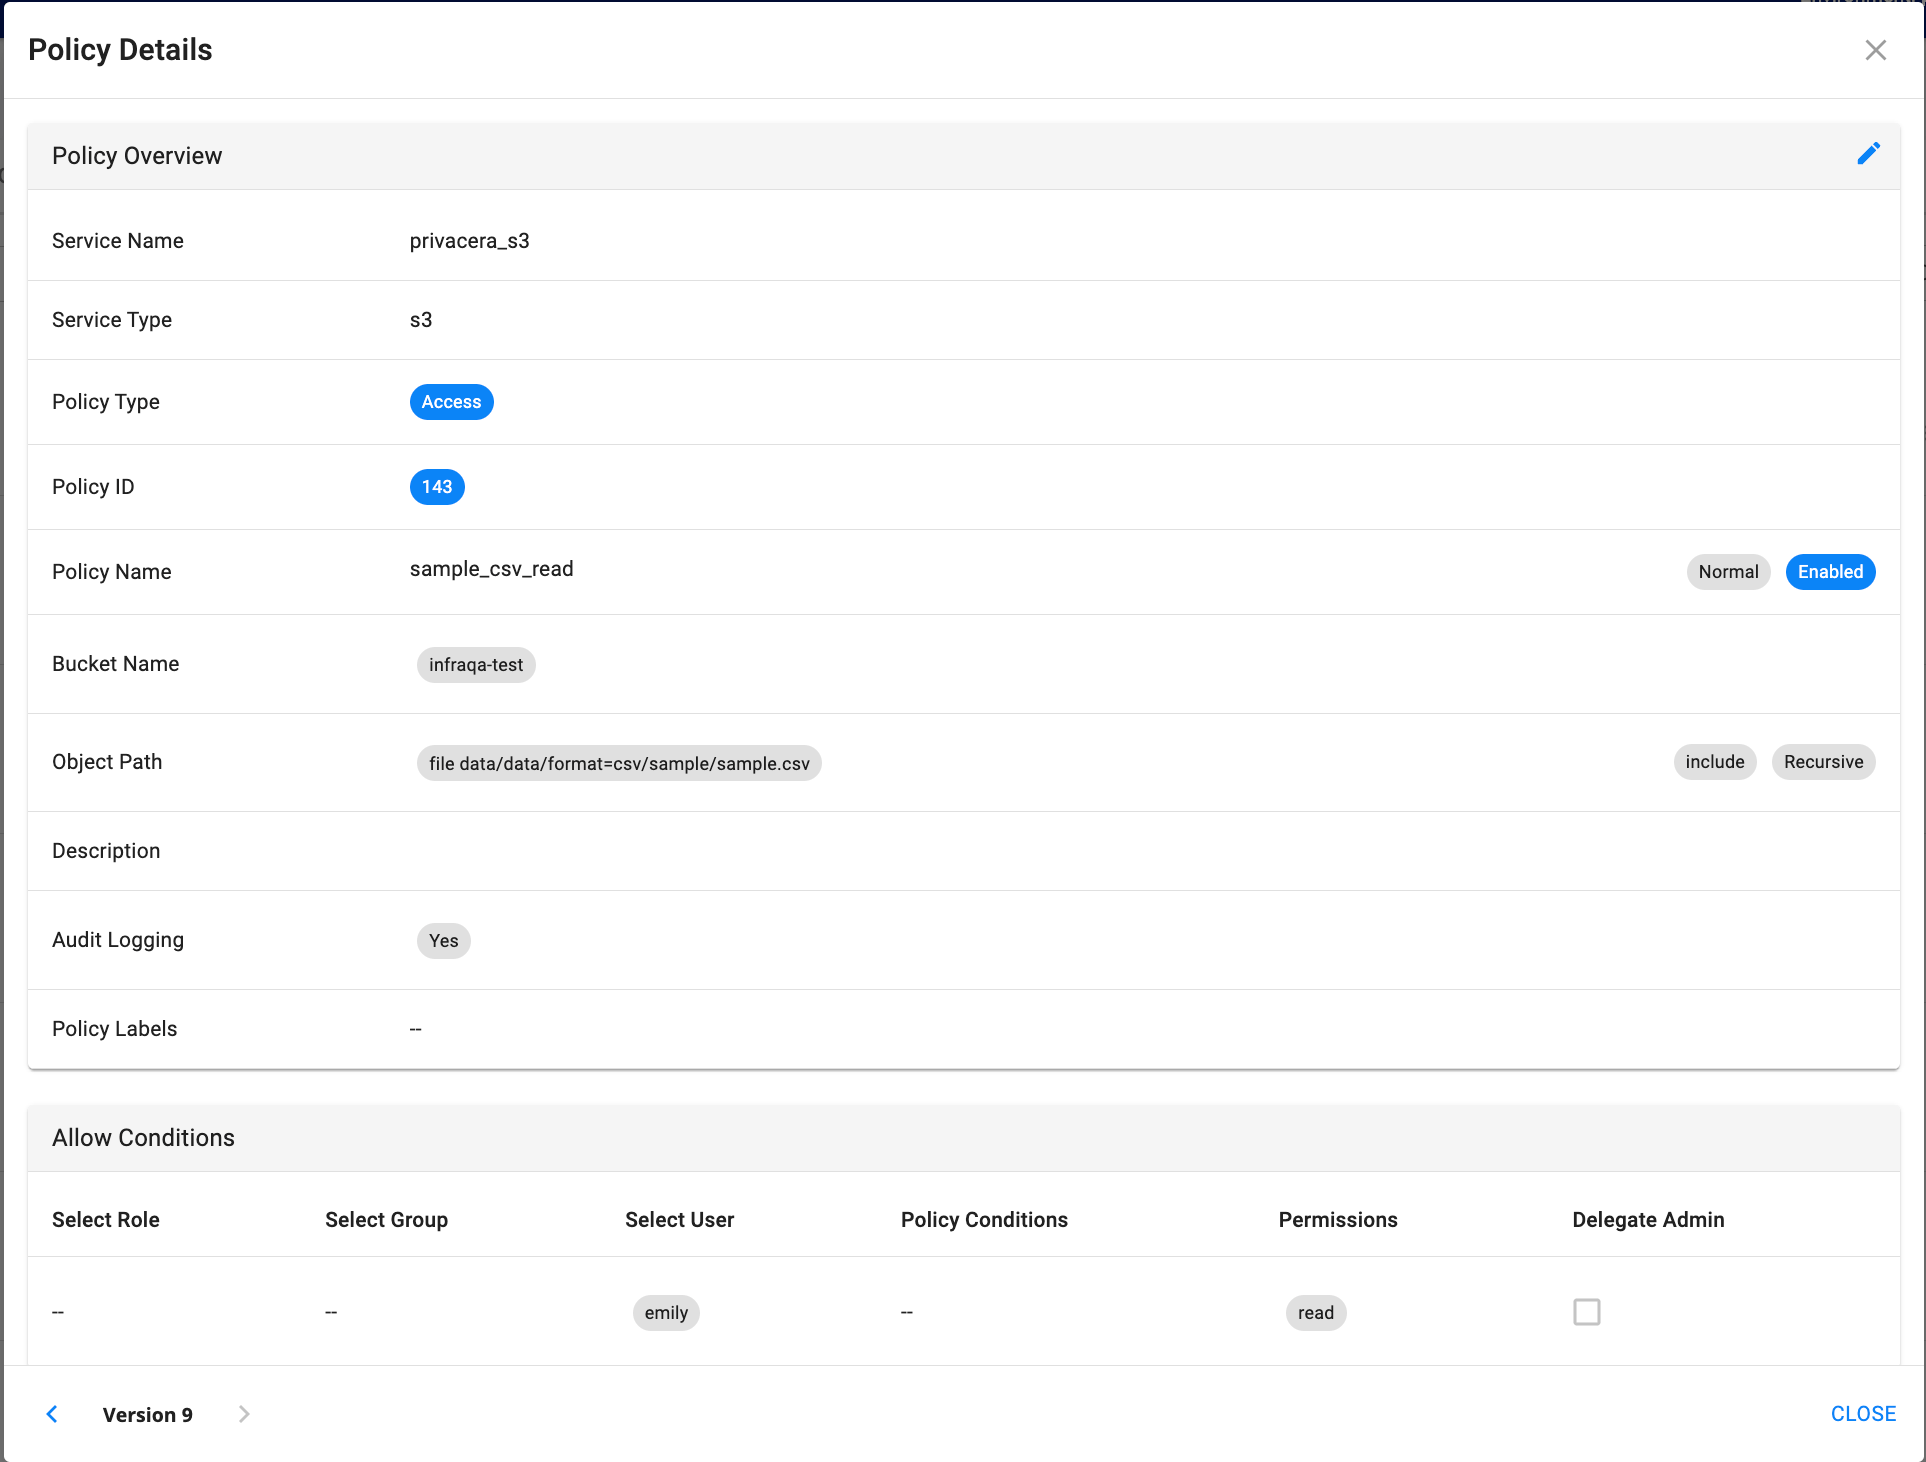
Sample Resource Policy:
- Policy Name: sample_csv_read
- Bucket Name: infraqa-test
- Object Path: file data/data/format=csv/sample/sample.csv
- Permissions: READ
- Select User: emily
-
Steps to Validate Policy:
- Log in to Databricks as a user defined in the resource policy.
- Create a new notebook or open an existing one, and associate it with the running Databricks cluster.
- In the notebook: Run the following scala command to read csv file from S3:
Scala - On the Privacera portal, navigate to Access Management -> Audits
- Review the results to determine the success or failure of the resource policy. A successful outcome indicates that the policy was enforced correctly.
-
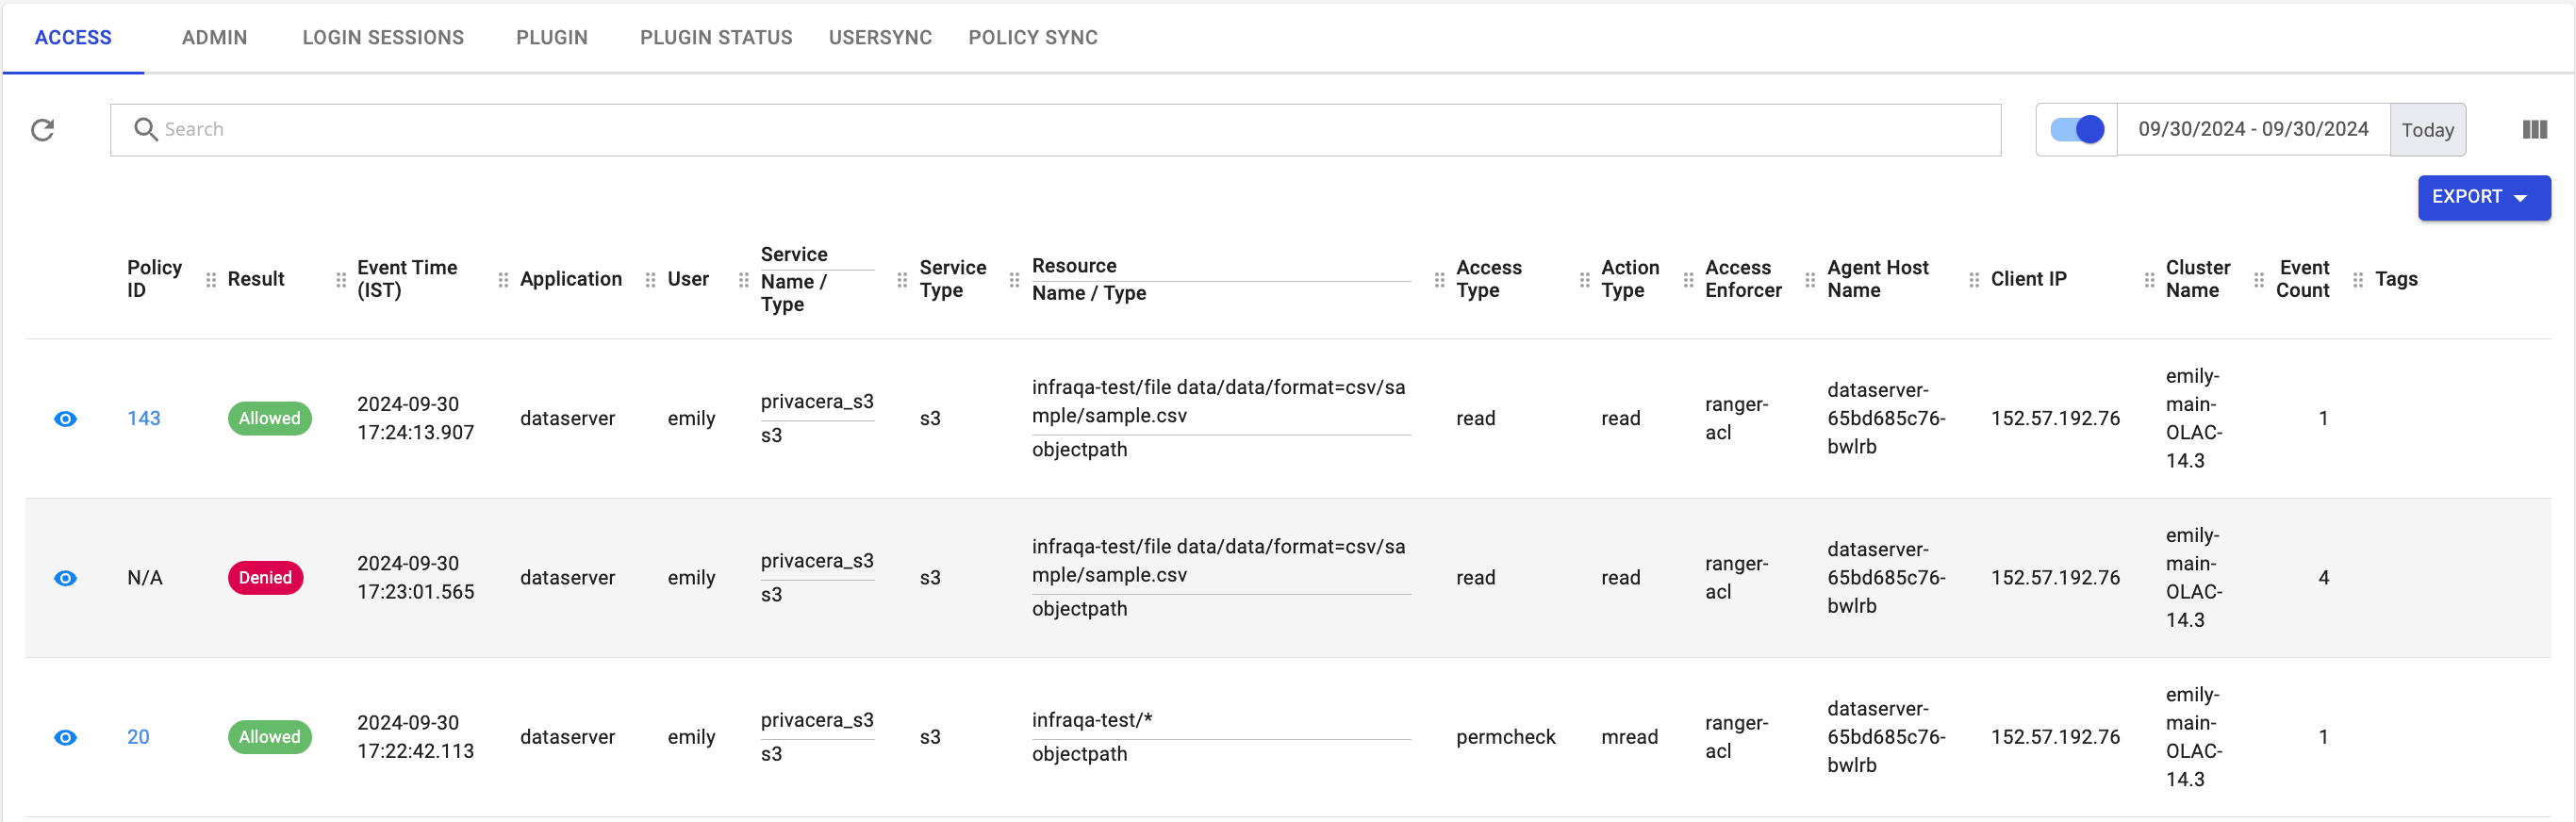
Sample Audit Logs:
- Prev topic: Prerequisites
- Next topic: Advanced Configuration