Setup for Access Management for Databricks all-purpose compute clusters with Fine-Grained Access Control (FGAC)
Configure
Perform the following steps to configure Databricks FGAC:
-
SSH to the instance where Privacera Manager is installed.
-
Run the following command to navigate to the /config directory.
Bash Note
JWT Authentication is enabled by-default for Databricks FGAC Plugin and thus needs JWT to be configured. Follow the steps given here to configure JWT for authentication.
-
Run the following command to copy the databricks FGAC plugin yml file from sample-vars, if it's not already present in custom-vars:
Bash -
Update the following properties in the
vars.databricks.plugin.ymlfile: -
Once the properties are configured, run the Privacera Manager post-install action Refer this
Enable Databricks Application
- In PrivaceraCloud, go to Settings -> Applications.
- On the Applications screen, select Databricks.
- Select Platform Type
- Enter the application Name and Description. Click Save. The name can be any name of your choice, e.g.,
Databricks. - Open the Databricks application.
- Enable the Access Management option with toggle button.
- Click on save button
Note
JWT Authentication is enabled by-default for Databricks FGAC Plugin and thus needs JWT to be configured. Follow the steps given here to configure JWT for authentication.
Download Script from PrivaceraCloud
- Open the Databricks application.
- Click on Access Management
- Click on Download Script
- Save the script locally as privacera_databricks.sh
Create Init script in Databricks Workspace File
- Login Databricks Web UI
- Click on the Workspace sidebar
- Click on the Workspace folder
- Click on Create -> Folder
- Name the folder privacera
- Click on Create
- Go inside the privacera folder
- Click on Create -> File
- Enter the new file name as privacera_databricks.sh
- Copy the content of the local privacera_databricks.sh and paste it into the workspace file privacera_databricks.sh
Create Databricks cluster policy
We recommend to use Databricks cluster policy to control cluster configuration. Here are the steps to create cluster policy:
- Log in to Databricks Web UI
- Click on the Compute icon on the sidebar
- Click on the Policies tab
- Click on the Create policy button
- Provide a name to the policy i.e privacera-fgac-cluster-policy
- Add the appropriate policy definition (JSON) based on your Databricks Runtime version.
-
Replace
<instance-profile-arn>with your actual instance profile ARN.Cluster policy JSON for Databricks Runtime Version 17.3 LTS
Cluster policy JSON for Databricks Runtime Version 16.4 LTS and below
-
Save the policy.
Create Databricks cluster
Here are the steps to create Databricks cluster with Privacera plugin (FGAC):
- Log in to Databricks Web UI
- Click on the Compute icon on the sidebar
- Click the Create Compute button.
- Fill in the cluster configuration details.
- Under the Cluster Policies dropdown, select the policy you created in the previous step (i.e., privacera-fgac-cluster-policy)
- Under the Advanced option :
- Select Workspace as the source for init scripts.
- Specify the Workspace file path:
- Self Managed
- /privacera/{DEPLOYMENT_ENV_NAME}/ranger_enable.sh
- PrivaceraCloud and Data Plane
- /privacera/{DEPLOYMENT_ENV_NAME}/privacera_databricks.sh
- Self Managed
- Click the Add button.
- Click Create Compute to create the cluster.
Validation
To confirm the successful association of an access management policy with data in your Databricks installation, follow these steps:
-
Prerequisites:
- A running Databricks cluster secured using the steps mentioned above.
- At least one resource policy associated with your data that grants a user access to the database.
- This resource policy must not be for Databrick's default database. Configure the policy for any database other than the default.
-
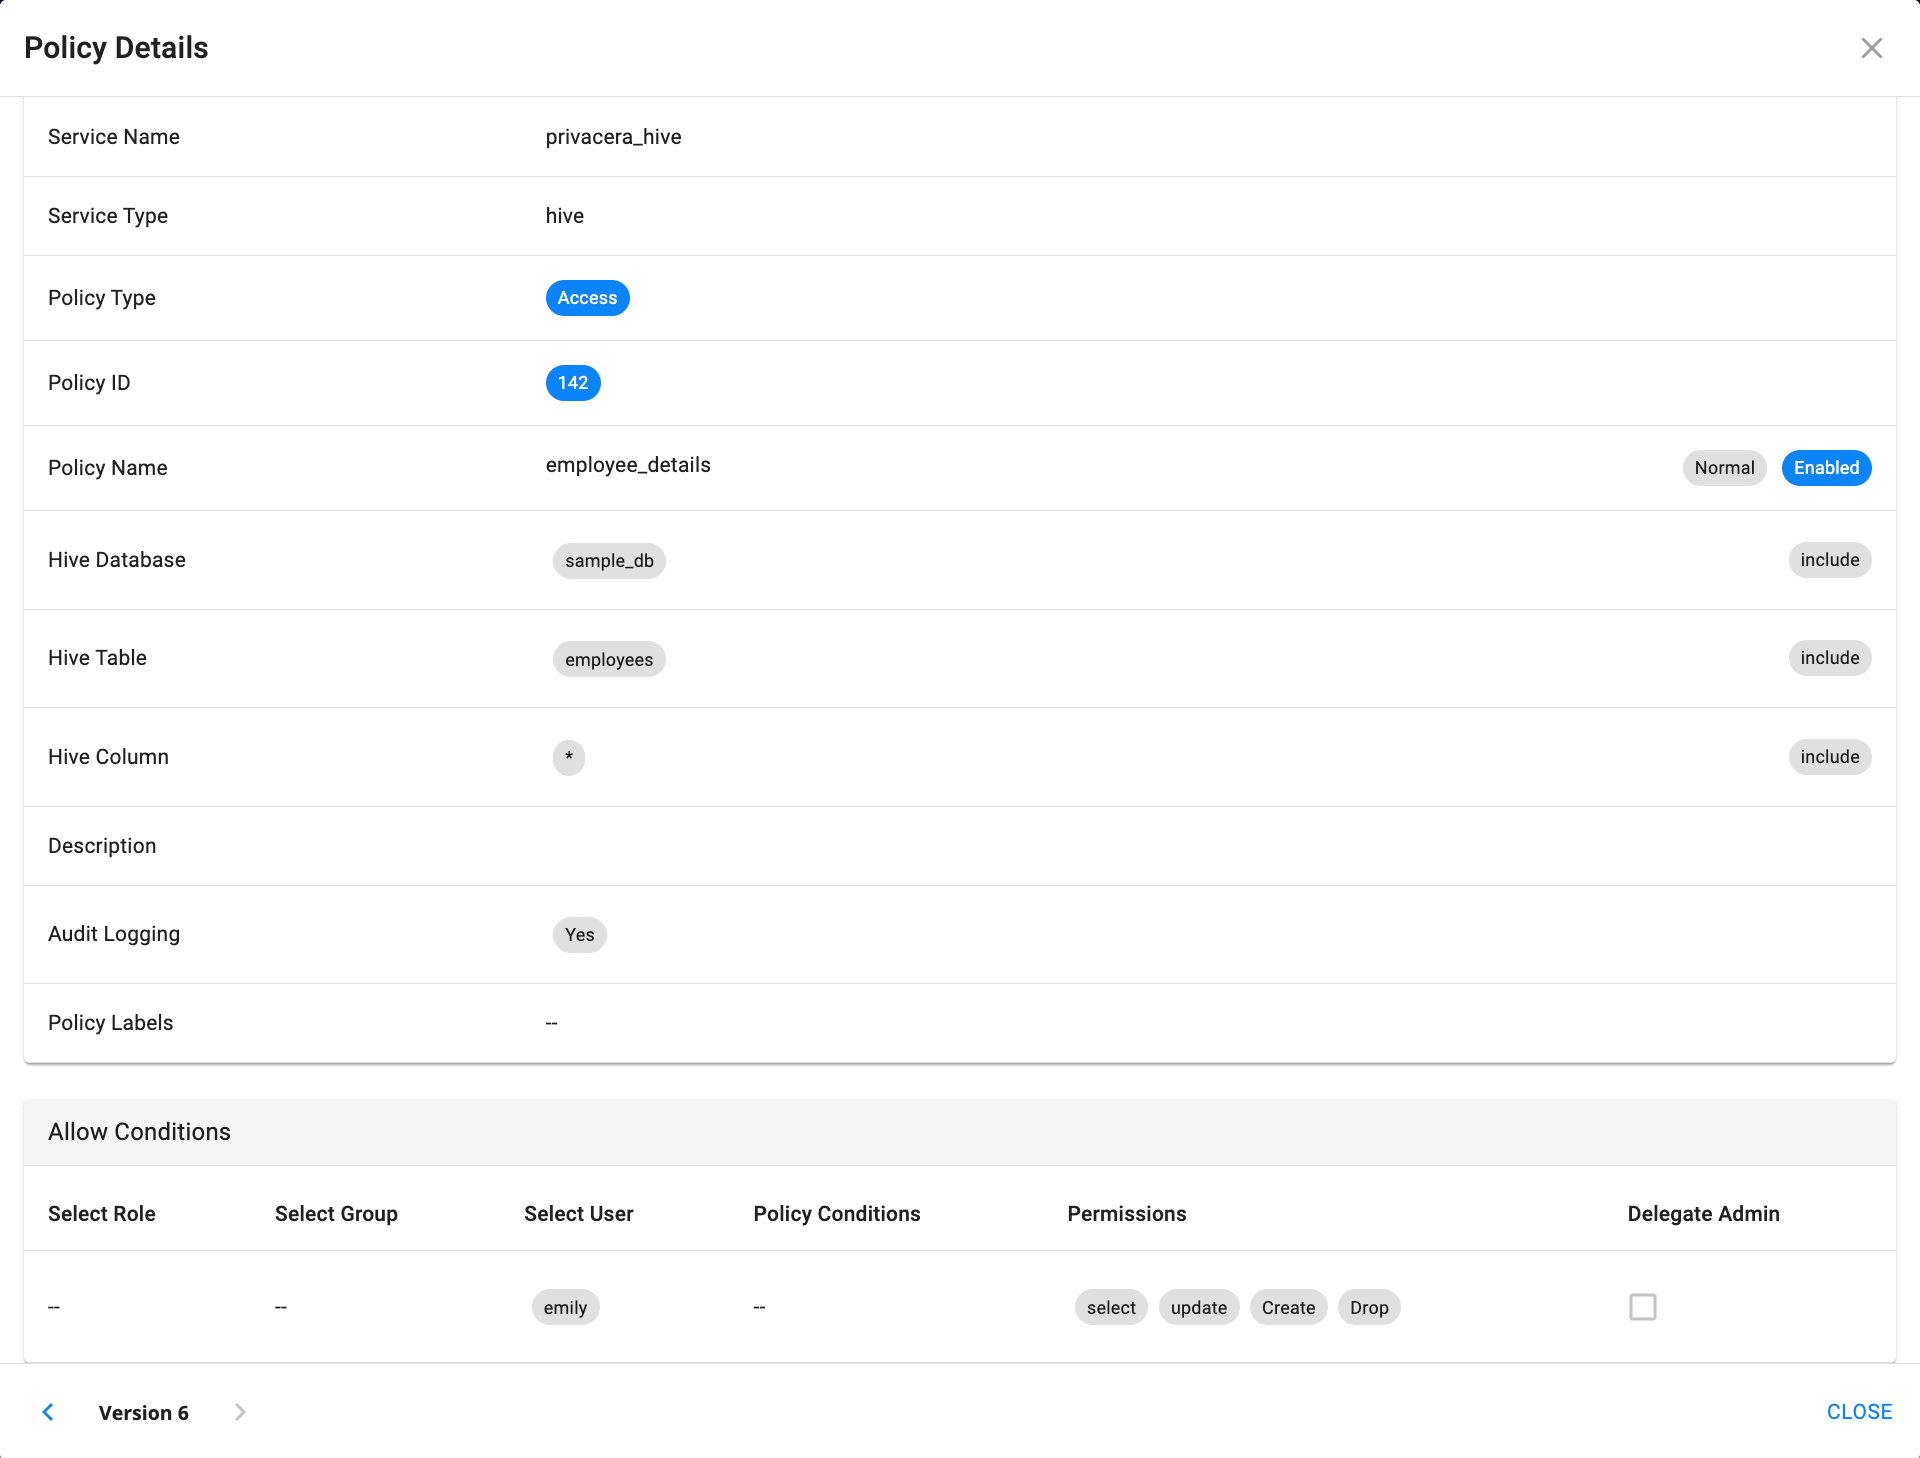
Sample Resource Policy:
- Policy Name: Employee Details
- Hive Database: sample_db
- Hive Table: employees
- Permissions: CREATE, UPDATE, SELECT, DROP
- Select User: emily
-
Steps to Validate Policy:
- Login to Databricks as a user who is defined in the resource policy.
- Create or open an existing notebook. Associate the Notebook with the running Databricks cluster.
- Select the database to which you have associated the policy.
- In the notebook, run following SQL commands to Create a sample table, Insert and Select the data:
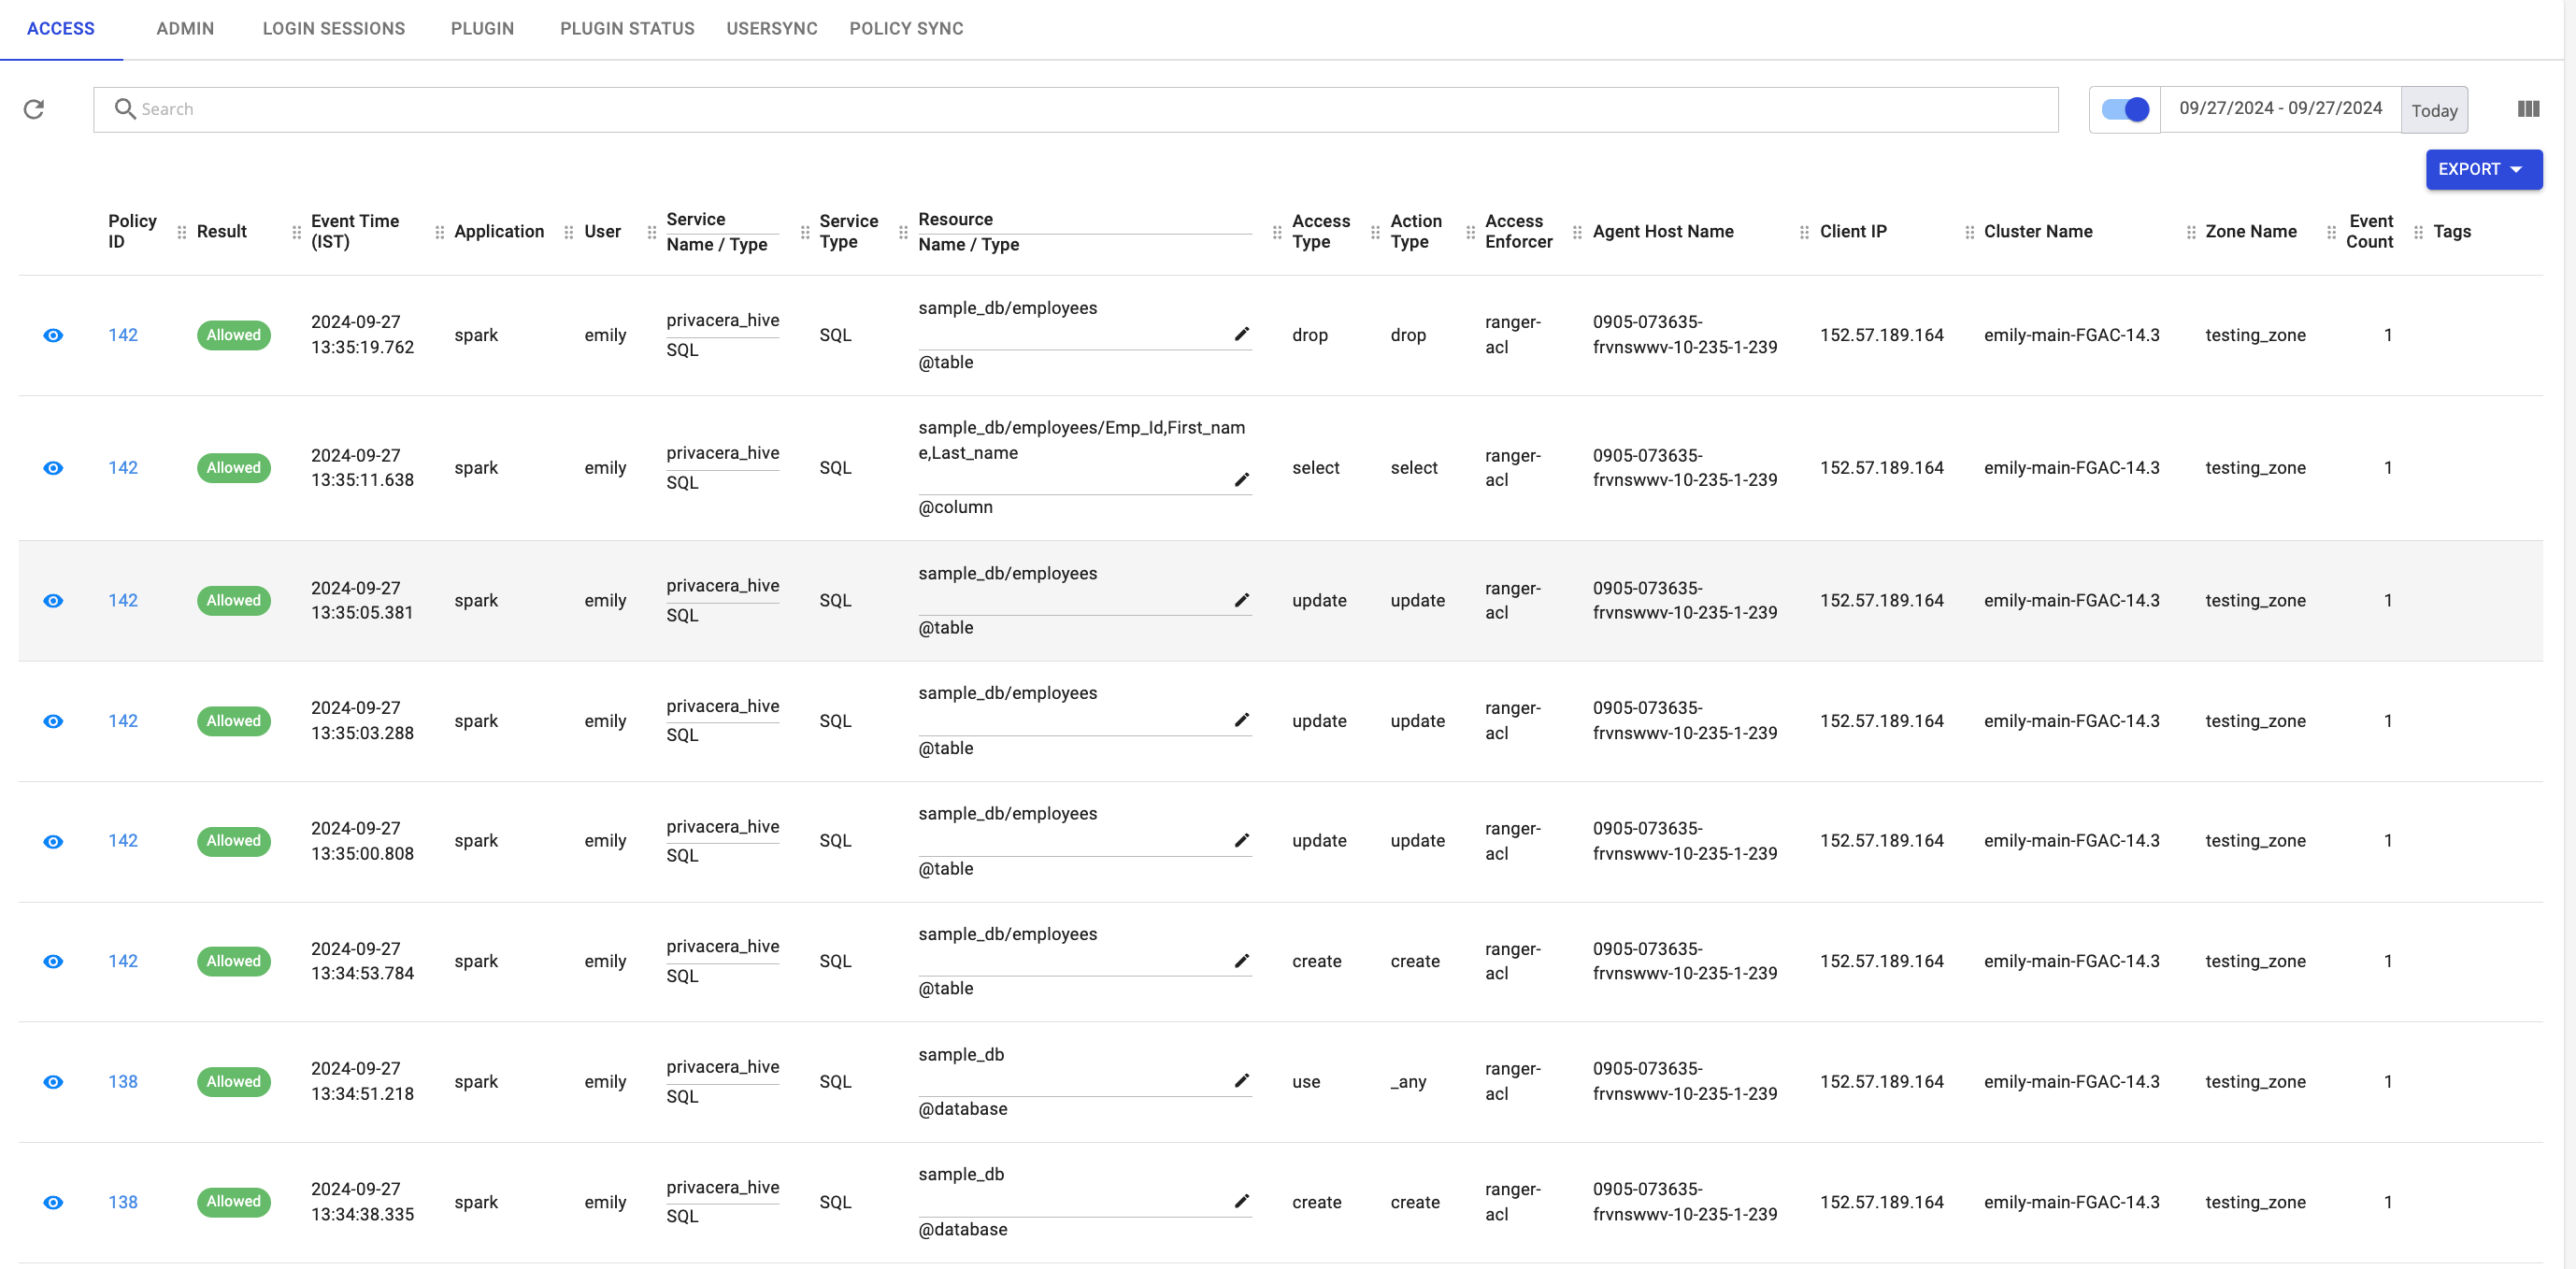
- On Privacera portal, go to Access Management -> Audits
- Check for the success or failure of the resource policy. A successful access is indicated as Allowed and failure is indicated as Denied.
-
Sample Audit Logs:
- Prev topic: Prerequistes
- Next topic: Advanced Configuration