Using Privacera Notification Templates in Grafana
This guide explains how to use the pre-configured Privacera notification templates with your contact points in Grafana.
Overview
Privacera provides a pre-configured notification template in Grafana that helps standardize alert notifications across your organization. The template is designed to deliver well-formatted, Kubernetes-aware alerts with actionable information and direct links to relevant resources.
Template Structure
The Privacera notification template (privacera.alert.message.template) includes the following structure:
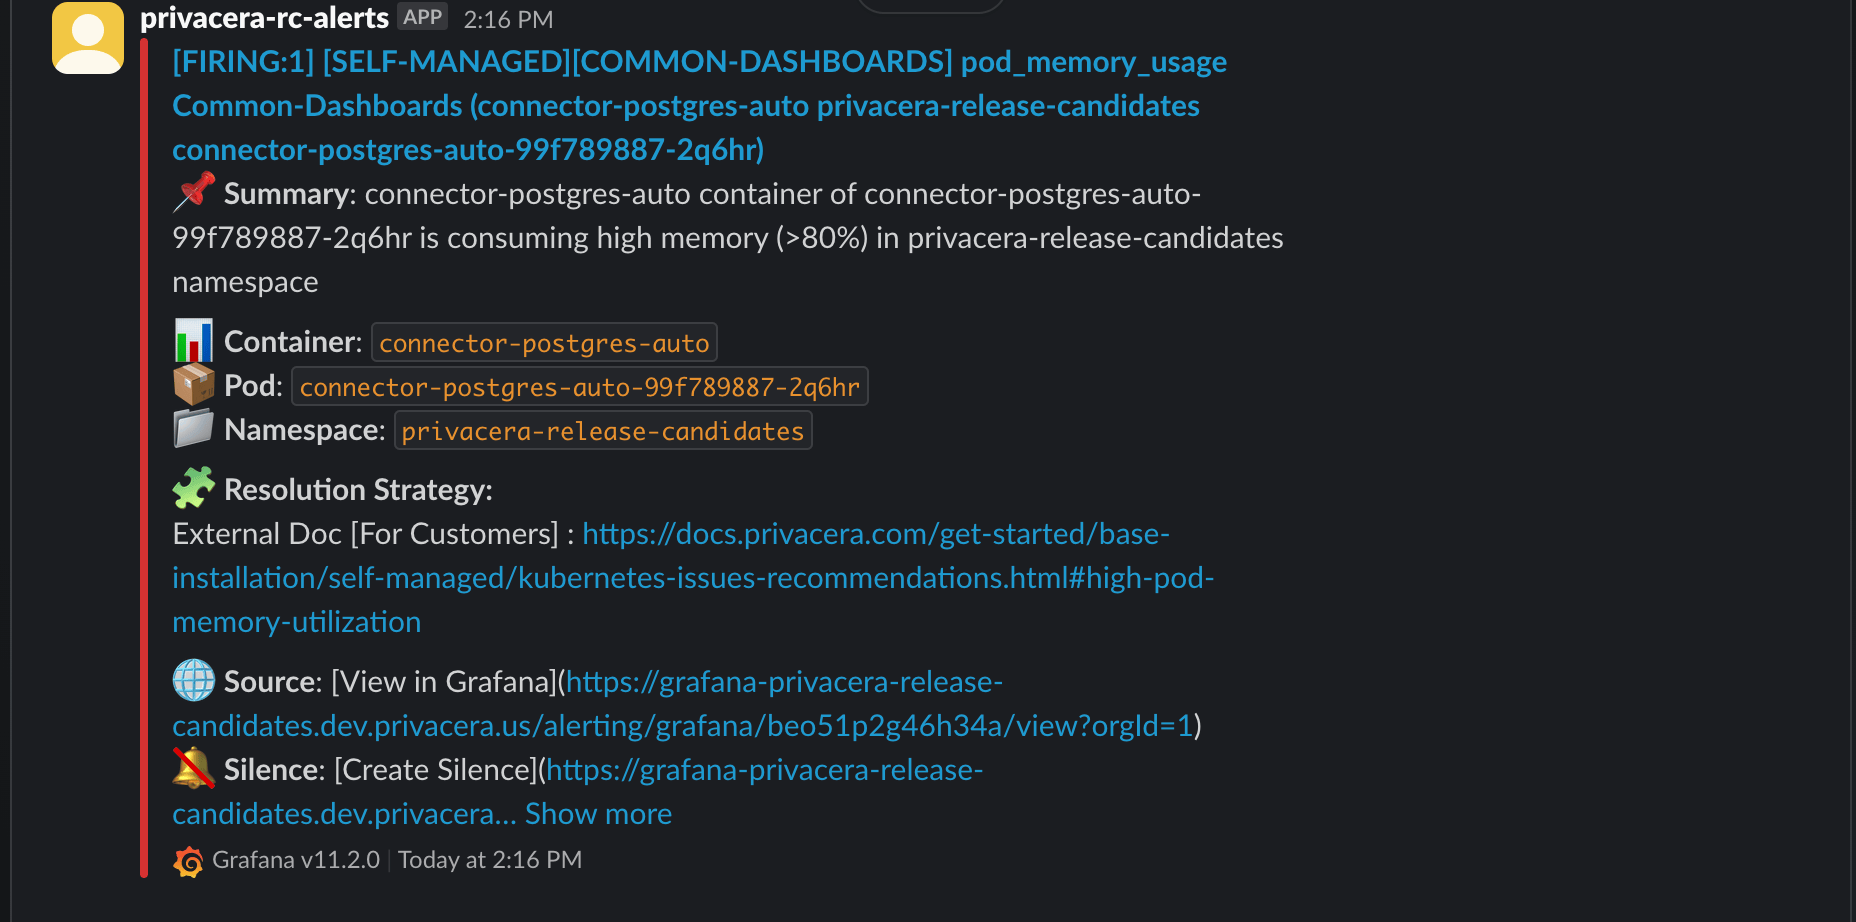
Sample Notification Template
Below is an example of how a notification using the Privacera template appears in Slack.
Associating Template with Contact Points
Step 1: Access Contact Points
- Log in to your Grafana instance.
- Navigate to Alerts & IRM → Alerting → Contact points.
Step 2: Create or Edit a Contact Point
- Either click on an existing contact point or select + Add contact point.
- Enter a descriptive name (e.g.,
Privacera Slack Alerts). - Select your preferred notification channel (Slack is recommended).
- Fill in the required configuration fields (e.g., Slack Webhook URL, channel).
Step 3: Apply the Template
- Scroll down and expand the Optional settings section.
- Click Edit next to the Message, Text Body, or integration-specific message field.
- In the dialog box, choose Select notification template.
- Select the
privacera.alert.message.templatefrom the list. -
Alternatively, select Enter custom message and paste the following:
Jinja Template Snippet
Django/Jinja -
Click Save to apply the template.
Step 4: Save Configuration
- Click Save contact point to save the changes.
- Your contact point is now using the Privacera notification template.
Testing the Configuration
- In the contact point list, find your configured contact point.
- Click the Test button.
- Verify that the test notification is received with the Privacera template format.
Troubleshooting
If you encounter any issues:
-
Template not applied correctly - Ensure
privacera.alert.message.templateis selected or pasted correctly. -
Slack or other channel misconfigured - Double-check channel credentials (webhook URL, tokens, etc.). - Validate message formatting with test alerts.
-
Kubernetes context missing - Make sure your alert rules include
namespace,pod, andcontainerlabels. -
Missing permissions - Ensure the user or token has permissions to view dashboards and create silence rules.